Key Takeaways
- Gua sha (刮痧, gua sha, "scraping sand") uses a smooth-edged tool to stroke lubricated skin, raising small red dots called sha that mark the release of stagnant blood and Qi.
- You need only two things to start: a gua sha board (jade, rose quartz, buffalo horn, or ceramic) and a carrier oil (jojoba, sweet almond, or coconut).
- Strokes always move outward and downward — from the center of the face toward the ear, and from the top of the neck toward the shoulders — following the natural flow of Qi.
- On the body, moderate pressure produces the therapeutic red marks; on the face, use only light pressure to avoid bruising delicate skin.
- Gua sha is never used over broken skin, moles, active acne, sunburn, or on people taking blood thinners without medical advice.
1. What Is Gua Sha?
Gua sha is one of the oldest hands-on therapies in Traditional Chinese Medicine, with a history stretching back over two thousand years. The name translates literally as "scraping sand" — gua means to scrape or stroke, and sha refers to the fine, sand-like red dots (petechiae) that rise to the skin's surface during treatment. These marks are not a bruise from injury; in TCM theory, they are the visible sign that stagnant blood, trapped metabolic waste, and blocked Qi have been brought to the surface where the body's lymphatic and circulatory systems can finally clear them away.
In a typical session, the practitioner — or you, at home — applies oil to the skin and then draws a smooth-edged tool repeatedly along the muscles and meridians. The strokes are always in one direction, never back and forth, and they follow the natural pathways of the body's energy channels. Where there is tension or stagnation, the skin flushes red and the characteristic sha marks appear. Where the tissue is healthy, the skin simply turns pink and warm. This immediate visual feedback is one of the things that makes gua sha so satisfying to practice: you can literally see where the problem was.
Today, gua sha has crossed from TCM clinics into mainstream wellness, largely through its facial application. The smooth jade and rose quartz boards you now see in every beauty shop are modern versions of the same tools Chinese families have used for generations. But the body techniques — on the neck, shoulders, and back — remain the most powerful and therapeutic use of this therapy, especially for the modern epidemics of desk-worker tension, screen-stiff necks, and stress-related muscle pain.
2. What You Need: Tools and Materials
One of the great advantages of gua sha is its simplicity. Unlike cupping or moxibustion, which involve heat and suction, gua sha requires nothing more than a smooth tool and a little oil. Here is exactly what you need and how to choose well.
The Gua Sha Board (Tool)
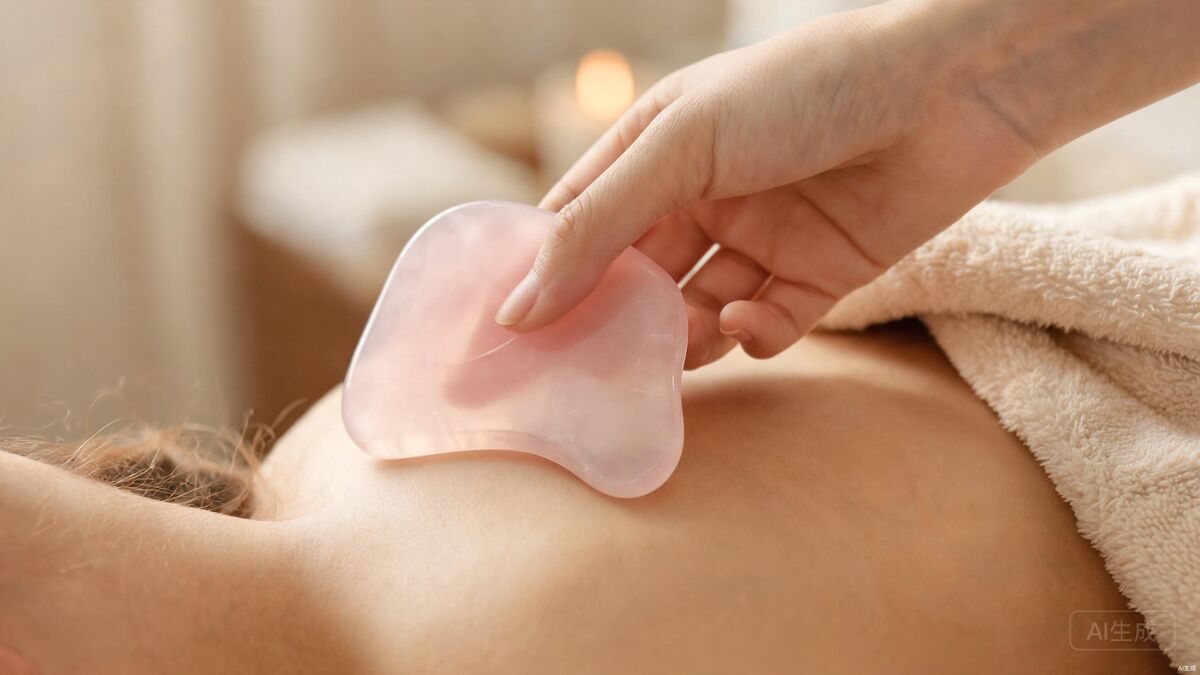
The gua sha board — sometimes called a gua sha stone or scraping board — is a flat, smooth-edged tool shaped to fit the contours of the body. The classic shape is a curved, heart-like or kidney-shaped piece with one notched edge (for the jaw and brow) and several smooth curved edges (for broad strokes on the cheeks, neck, and back). The tool must have smoothly rounded edges with no nicks or sharp corners — this is the single most important quality to check.
| Material | Feel | Best For | Notes |
|---|---|---|---|
| Buffalo horn (牛角) | Smooth, slightly warm, traditional | Body & face; the classic TCM choice | Durable, the most traditional material. Avoid water soaking — it can crack. |
| Jade (玉石) | Cool, heavy, soothing | Face; de-puffing and calming | The most popular for facial gua sha. Naturally cool, which helps reduce puffiness. |
| Rose quartz | Cool, smooth, attractive | Face; same as jade | A popular alternative to jade with the same cooling property. |
| Ceramic / porcelain | Smooth, cool, affordable | Body; traditional folk use | A Chinese porcelain soup spoon is the original DIY gua sha tool. |
| Stainless steel | Very smooth, cold, easy to clean | Body; deep tissue work | Used in professional TCM clinics for body scraping. |
For a beginner, a jade or rose quartz board for the face and a buffalo horn board for the body give you the best of both worlds. If budget is a concern, a single buffalo horn board works for both face and body — just use lighter pressure on the face.
The Carrier Oil (Lubricant)
Gua sha must never be performed on dry skin. The oil serves two purposes: it allows the tool to glide smoothly without dragging or irritating the skin, and the warmth and friction help open the pores so the therapy penetrates more deeply. You need only a thin film — a few drops for the face, a teaspoon for the body area.
| Oil | Skin Type | Properties |
|---|---|---|
| Jojoba oil | All, especially acne-prone | Closest to human sebum; non-comedogenic; light, fast-absorbing. The best all-rounder. |
| Sweet almond oil | Dry, normal | Rich in vitamin E; nourishing and slightly warming; good for body work. |
| Coconut oil | Dry skin (use sparingly on face) | Warming and moisturizing; can clog pores on acne-prone faces. Best for body. |
| Grapeseed oil | Oily, combination | Very light, non-greasy; good for facial use in warm weather. |
| Sesame oil | All (body) | A TCM favorite — warming, penetrates deeply, good for winter body gua sha. |
Avoid oils with strong fragrances, essential oil blends, or mineral oil for your first sessions — you want to know how your skin reacts to a single, pure carrier oil before adding anything else.
3. How to Do Gua Sha: Step-by-Step by Body Area
The core principle of all gua sha is simple: stroke in one direction, repeatedly, with the smooth edge of the tool flat against the skin at roughly a 30- to 45-degree angle. Never scrape back and forth. Each stroke should be 5 to 10 cm (2 to 4 inches) long, and you repeat each line 5 to 15 times before moving to the next area. The tool should always move outward and downward — away from the center of the face, and downward along the neck and body — following the natural flow of Qi and lymph.
- Face: Light pressure — the weight of the tool itself is almost enough. The skin should turn pink, not red or bruised. No sha marks should appear on the face.
- Neck & shoulders: Moderate pressure — you feel a firm friction and mild warmth. Light sha may appear.
- Back: Moderate to firm pressure — this is where the deepest stagnation lives and where sha marks are most expected.
- If it hurts, you are pressing too hard. Gua sha works by sustained, repeated strokes — not by force.
A. Facial Gua Sha
Facial gua sha is the gentlest form of the practice. The goal here is not to produce sha marks but to encourage lymphatic drainage, boost microcirculation, and release tension in the facial muscles. Always apply 3 to 5 drops of oil first and let it absorb for a minute.
- Center of forehead to temple. Hold the board flat against the center of your forehead. Stroke outward toward your left temple in one smooth motion. Repeat 8 to 10 times, then switch to the right side. This releases forehead tension from frowning and screen-squinting.
- Brow bone. Using the notched edge of the board, place it at the inner end of your eyebrow (near the nose) and glide outward along the brow bone to the temple. Repeat 5 to 8 times per brow. Excellent for eye strain and tension headaches.
- Under-eye to temple. With the gentlest pressure of the entire routine, place the smooth curved edge just below the inner corner of your eye and glide outward to the temple. Repeat 5 times. This is the area for de-puffing and dark circles — be exceptionally light here.
- Cheekbone to ear. Place the board flat on the center of your face, beside your nostril. Stroke upward and outward along the cheekbone toward your ear. Repeat 8 to 10 times per side. This is the lifting stroke that defines the jaw and cheek.
- Jawline (the "notch" stroke). Place the notched edge of the board in the soft notch of your chin. Glide along the jawline upward and outward toward the earlobe. Repeat 8 to 10 times per side. This is the stroke most people want for jaw tension and definition.
B. Neck Gua Sha
The neck is the bridge between the face and the body, and neck gua sha is where you begin to feel real therapeutic release. This is especially powerful for people who sit at computers all day.
- Back of neck — top to bottom. Apply oil along the back of the neck. Starting at the base of the skull, stroke downward along the muscles on either side of the spine toward the shoulders. Use the broad flat edge of the tool. Repeat 15 to 20 times on each side. This is the most important stroke for "tech neck" and tension headaches.
- Side of neck — top to bottom. Turn your head slightly to one side. Stroke from just below the ear downward along the side of the neck to the collarbone. Repeat 10 to 15 times per side. This drains lymph and releases the sternocleidomastoid muscle.
- Front of neck — very light. Using only the weight of the tool, stroke gently from under the chin downward to the collarbone. Repeat 5 to 8 times. Skip this area if you have thyroid issues or a very sensitive neck.
C. Shoulder Gua Sha
The shoulders are where most adults carry the heaviest tension. This is where you can use moderate pressure and where sha marks commonly appear.
- Top of shoulder — neck to arm. Apply oil to the trapezius muscle (the muscle between your neck and shoulder joint). Stroke from the base of the neck outward along the top of the shoulder toward the arm. Repeat 15 to 20 times per side. You will likely feel this is tender — that is the stagnation releasing.
- Top of shoulder blade. Reach across your body with the tool. Stroke downward along the top edge of the shoulder blade, from the inner edge near the spine outward and downward. Repeat 15 times per side.
- Between shoulder blades. Have a partner stroke downward on either side of the spine, from between the shoulder blades to the lower back. If you are alone, use a gua sha board with a long handle, or focus on the areas you can reach.
D. Back Gua Sha
The back is the largest area for gua sha and the place where the deepest, most colorful sha marks appear. It is best done with a partner, though you can reach the upper back yourself. Apply a generous amount of oil.
- Along the spine — downward. Stroke downward on either side of the spine (not directly on the vertebrae), about two finger-widths to the side. Start between the shoulder blades and work down to the lower back. Repeat 15 to 20 times per line, working your way across the back in parallel lines.
- Lower back — outward. From the spine, stroke outward and downward across the lower back toward the hip. This is especially useful for lower back pain and cold-type stiffness.
- Finish each area when the sha appears. When you see the red marks rise evenly across a line, that area is done. Move on. Do not keep scraping an area that has already released its sha.
4. The Benefits: What Gua Sha Does
From the TCM perspective, gua sha works by moving Qi and Blood — two of the body's most fundamental substances. When Qi and Blood stagnate in the muscles and meridians, the result is pain, stiffness, tension, and eventually illness. Gua sha physically breaks up that stagnation and restores the normal flow. Modern research has begun to confirm several of these traditional claims.
Promotes Blood Circulation
The scraping action increases blood flow to the treated area by up to 400 percent in the minutes following treatment, according to some studies. This brings fresh oxygen and nutrients to tense, oxygen-starved muscle tissue and helps clear metabolic waste products like lactic acid that accumulate in knots and trigger points. This is why gua sha feels so immediately relieving for stiff muscles.
Relieves Muscle Tension and Pain
Gua sha is one of the most effective self-care techniques for myofascial pain — the deep, aching tension in the neck, shoulders, and back that comes from posture, stress, and overuse. Clinical studies have shown it to be effective for chronic neck pain, and many people feel relief after a single session. The combination of mechanical release and increased blood flow helps reset chronically tight muscles.
Releases Toxins and Supports Immunity
In TCM terms, gua sha "releases the exterior" — meaning it helps the body expel pathogens that are trapped at the surface level. This is why gua sha on the upper back and neck is a traditional remedy for the early stage of a cold. The increase in surface blood flow and the stimulation of lymphatic drainage support the body's natural clearing mechanisms. Some research suggests gua sha may have a mild immune-boosting effect through these mechanisms.
Improves Complexion and Reduces Puffiness
Facial gua sha has become wildly popular for good reason. The light, repeated strokes stimulate microcirculation in the skin, drain stagnant lymphatic fluid (the cause of morning puffiness), and release tension in the facial muscles that contributes to lines and a tired appearance. With regular practice, most people notice a brighter, more even complexion and a more defined jawline within two to three weeks.
5. Understanding the Sha Marks
| Sha Color | TCM Interpretation |
|---|---|
| Pale red or pink | Mild stagnation; healthy response. The area is functioning relatively well. |
| Bright red | Recent stagnation or mild heat; the blood is trying to move through a tight area. |
| Dark red or purple | Long-standing blood stasis; chronic tension or old injury in the area. |
| Dark purple, nearly black | Severe, long-term stasis; significant cold or old trauma. This area needs repeated sessions. |
| No sha, just pink skin | Little or no stagnation; the area is healthy. This is the goal. |
The marks fade within 3 to 7 days, depending on their darkness and your circulation. As you treat the same area over weeks, you will notice the sha becomes lighter and lighter — a sign that the stagnation is clearing and the tissue is healing. Never scrape over an area that still has visible sha marks. Wait until they have fully faded.
6. Safety and Contraindications
- Broken, cut, or abrasioned skin — never scrape over wounds, scratches, or recent scars.
- Active acne, rashes, or sunburn — the scraping will spread inflammation and worsen the condition.
- Moles, skin tags, or birthmarks — scrape around them, never over them.
- Varicose veins or spider veins — avoid these areas entirely.
- Over recent fractures or acute injuries — wait until the area is fully healed.
- During pregnancy — avoid the abdomen and lower back; consult a practitioner before any body gua sha.
- Blood thinners or bleeding disorders — gua sha increases surface bleeding; consult your doctor first.
- Right after a large meal or when very fatigued — wait at least an hour after eating.
After a session, drink a glass of warm water and stay warm. Avoid cold drinks, cold wind, and bathing or showering for at least 30 minutes — the pores are open and the body is releasing, so you want to protect that process. Some people feel deeply relaxed or even slightly sleepy after gua sha; this is normal and a sign that the nervous system has shifted into a parasympathetic (rest-and-digest) state.
7. Buying Your Gua Sha Tools
All the tools and oils you need are easily available online. Here is what to look for.
| Item | Where to Buy | What to Look For |
|---|---|---|
| Jade or rose quartz gua sha board | Amazon, beauty supply stores, iHerb | Smooth, polished edges with no nicks. Hold it to your skin — it should glide with no catching. Avoid cheap plastic imitations. |
| Buffalo horn gua sha board | Amazon (search "niu jiao gua sha board"), TCM supply shops | Genuine horn has a warm, organic feel and natural variation in color. Keep it dry — soaking can cause cracking. |
| Jojoba oil | Amazon, iHerb, health food stores, Whole Foods | Cold-pressed, 100% pure. A 4 oz bottle lasts months. |
| Sweet almond oil | Amazon, iHerb, pharmacies | Cold-pressed, unrefined. Excellent for body gua sha. |
| Coconut oil | Any grocery store | Virgin, unrefined. Solid at room temperature; melts on contact with skin. |
Amazon tip: Search for "gua sha tool" and look for boards with hundreds of positive reviews. Good entry-level jade boards cost $5 to $15, and buffalo horn boards run $8 to $20. A bottle of cold-pressed jojoba oil is about $10. Your complete starter kit should cost under $30.
Frequently Asked Questions
Does gua sha hurt?
Gua sha should not be painful. On the body, you will feel a scraping or friction sensation and a mild warmth, and the area may feel slightly tender as the sha marks appear — similar to a deep massage. On the face, the pressure is very light and should feel like a gentle, relaxing glide. If you feel sharp pain, you are pressing too hard. The therapy works with moderate, sustained, repeated strokes, not with force. Reduce the pressure until it feels comfortably firm, like a deep massage, and you will get better results with less soreness.
How often should I do gua sha at home?
For the face, 3 to 5 times per week is ideal, using light pressure and always with oil. For the body (neck, shoulders, back), 2 to 3 times per week is sufficient, since the deeper strokes produce sha marks that need time to fade. The most important rule is: never scrape over an area that still has visible sha marks. Wait until they have faded — usually 3 to 7 days — before treating the same spot again. Daily deep body gua sha on the same area can bruise the tissue and is counterproductive.
What do the red marks after gua sha mean?
The red or purple spots are called sha. In TCM, they indicate that stagnant blood and metabolic waste have been brought to the surface to be cleared by the body. Light red sha suggests mild stagnation; dark purple sha suggests deeper, older blood stasis, cold, or an old injury. The color often lightens over successive sessions as the area heals and circulation improves. The marks are not bruises in the injury sense — they are an expected therapeutic response. They are painless to the touch (unlike a true bruise) and fade within 3 to 7 days.
Can I use a spoon or coin instead of a gua sha tool?
Yes, in a pinch. Gua sha literally means "scraping," and traditionally people used Chinese porcelain soup spoons, coins, or smooth bamboo. A porcelain soup spoon with a smooth, rounded edge works surprisingly well on the body. However, a purpose-made gua sha board is better because its curved edges are designed to fit the contours of the face, jaw, and brow, and stone tools like jade and horn feel smoother and cooler on the skin. Avoid anything with sharp, rough, or chipped edges — the smoothness of the tool's edge is the single most important safety factor.
This article is for educational purposes only and does not constitute medical advice. Gua sha is a traditional therapy and is not intended to diagnose, treat, cure, or prevent any disease. Always consult a qualified healthcare provider before beginning any new therapy, especially if you are pregnant, have a bleeding disorder, take blood-thinning medication, have a skin condition, or have a serious medical condition. Discontinue use and seek medical attention if you experience unusual pain, prolonged bruising, or skin irritation. Read our full disclaimer →