Key Takeaways
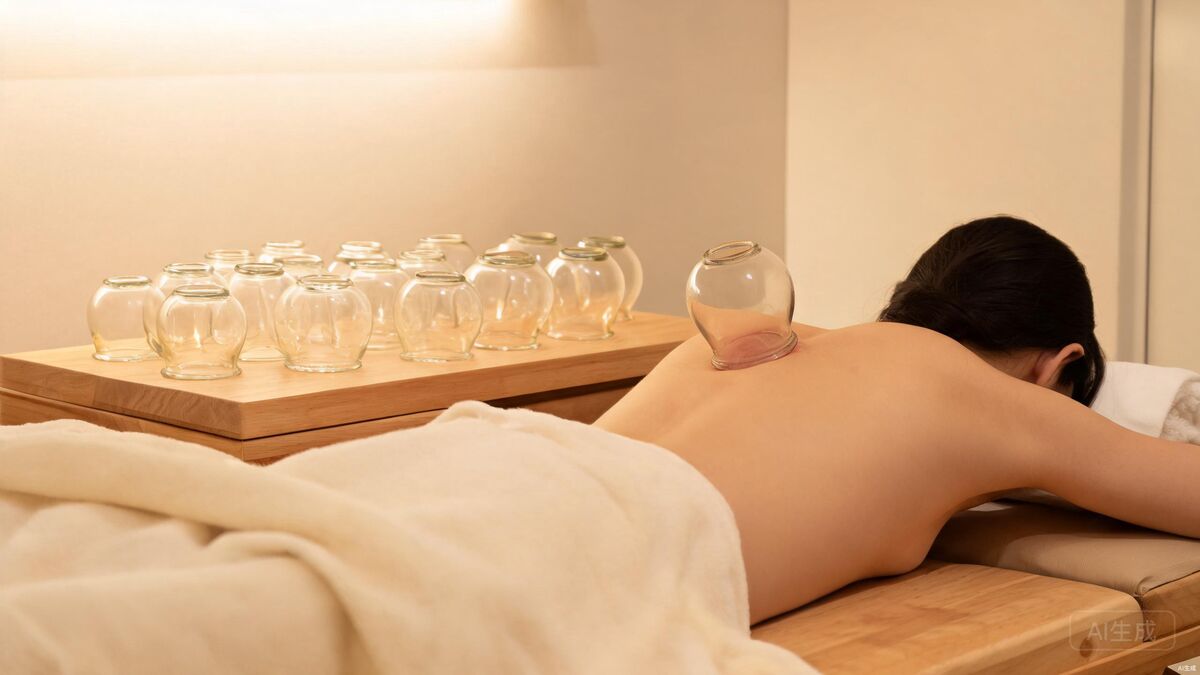
- Cupping (拔罐, ba guan) uses suction to draw blood and Qi to the surface, releasing muscle knots, pulling out cold and damp, and relieving pain.
- For home use, a vacuum cupping set with a hand pump is strongly recommended over fire cups — same effect, no burn risk, and precise suction control.
- Leave cups on for 5 to 15 minutes only. Never exceed 15 minutes, and never cup the same spot two days in a row.
- The circular marks left behind are normal and diagnostic — their color reveals the depth of stagnation in the tissue beneath.
- Cupping is contraindicated over broken skin, the abdomen in pregnancy, major arteries, the face, the spine, and on people with bleeding disorders or fragile skin.
1. What Is Cupping and How Does It Work?
Cupping is a therapy with a 2,000-year history in Chinese medicine and parallel traditions across the Middle East and Mediterranean. The principle is simple but powerful: a cup is placed on the skin and the air inside is removed, creating a vacuum that pulls the skin and underlying tissue upward into the cup. This suction does something that no amount of pressing or massaging can achieve — it draws blood from deep within the muscle up to the surface, where it can be seen, felt, and ultimately cleared by the body's circulatory and lymphatic systems.
In TCM theory, cupping works on three levels. First, it moves stagnant Qi and Blood — when these vital substances are stuck in tight, knotted muscle, the result is pain and stiffness. The suction physically pulls that stagnation outward. Second, it draws out cold and damp, two pathogenic factors that TCM identifies as the root of many chronic aches, especially in the back, shoulders, and joints. Third, it opens the pores, allowing the body to release what TCM calls "external pathogens" — the reason cupping on the upper back is a traditional treatment for the early stage of a cold.
The circular marks that cupping leaves — those famous dark spots that made headlines during the Olympics — are not bruises from impact. They are the visible evidence of stagnant blood and metabolic waste that has been drawn to the surface. A healthy area with good circulation produces only a light pink mark that fades quickly. A chronically tight, cold, or injured area produces a dark purple mark that takes days to clear. Reading these marks is one of the most useful diagnostic tools in home cupping.
2. What You Need: Tools and Materials
To cup safely at home, you need very little equipment. The single most important decision is choosing the right type of cup.
Fire Cups vs. Vacuum Cups
There are two main methods of creating the vacuum inside the cup, and for home use the choice is clear.
| Feature | Fire Cupping (火罐) | Vacuum Cupping (真空罐) |
|---|---|---|
| How vacuum is created | A flaming cotton ball heats the air inside a glass cup; as it cools, suction forms | A hand pump removes air through a valve in the cup |
| Burn risk | Real — alcohol drips, hot glass, and skin burns are possible | None — no flame involved |
| Suction control | Fixed — you get whatever the cooling air provides | Precise — pump more for stronger, less for lighter |
| Release | Press the skin beside the cup to break the seal | Press the release valve — instant, clean |
| Visibility | Glass is transparent — you can see the skin | Plastic cups are transparent; silicone cups are not |
| Home suitability | Not recommended for beginners | Strongly recommended for home use |
Our recommendation: Buy a vacuum cupping set with a hand pump. These sets cost $15 to $30 on Amazon, include cups in multiple sizes, and eliminate the single greatest risk of home cupping — fire. You get the same therapeutic effect with none of the burn danger and far more control.
The Vacuum Cupping Set
A standard home vacuum cupping set includes the following:
| Item | Purpose |
|---|---|
| Hand pump (pistol grip) | Removes air from the cups through a connector to create suction |
| Large cups (approx. 5–6 cm diameter) | For the back, thighs, and large muscle areas |
| Medium cups (approx. 4 cm) | For the shoulders, arms, and calves |
| Small cups (approx. 2.5–3 cm) | For the neck, forearms, and smaller areas |
| Extension tube | Allows you to pump cups on your own back that you cannot reach directly |
| Massage oil (optional) | Applied to the skin for "sliding cupping" — moving the cup along the muscle |
The oil is optional but useful. For stationary cupping (leaving cups in place), no oil is needed. For sliding cupping (moving the cup along the muscle like a deep massage), you need a light coat of oil so the cup glides. Sweet almond oil, jojoba oil, or any massage oil works well.
3. How to Cup: Step-by-Step
Once you have your vacuum cupping set, the technique is straightforward. Follow these steps for a safe, effective session.
Step 1: Prepare the Area
Choose a comfortable position where the muscle you want to cup is relaxed. For the back, lie face down on a firm surface or sit leaning forward over a table with a pillow. Clean the skin with a warm, damp cloth — do not apply lotions or creams (they prevent the cup from sealing), though a thin layer of oil is fine for sliding cupping. Make sure the area is warm and free of drafts; cupping opens the pores, and cold air can enter the body.
Step 2: Place the Cup
Select a cup size that fits the area. Press the cup firmly against the skin to create a seal. For the back and shoulders, use the large or medium cups. For the neck, use the small cups. The cup's rim must make full contact with the skin in a complete circle — if there is a gap, the vacuum will not hold.
Step 3: Create the Suction with the Pump
Attach the hand pump to the valve on top of the cup. Squeeze the pump 2 to 4 times. You will see the skin rise inside the cup and feel a pulling sensation. For your first session, pump only 2 times — you want to experience light suction before going deeper. The skin inside the cup should rise about 1 to 2 cm (half an inch). If the suction is too strong or painful, press the release valve on top of the cup to let air in, then start over with fewer pumps.
- Light suction (2 pumps): Skin rises 1 cm. Good for first-timers, sensitive areas, and the elderly.
- Medium suction (3 pumps): Skin rises 1.5 cm. Standard for most muscle pain and tension.
- Strong suction (4 pumps): Skin rises 2+ cm. Only for thick, chronically tight muscles like the upper back. Do not use on the neck or thin skin.
- If it hurts, release immediately. Cupping should feel like a firm pull, not sharp pain. Pain means too much suction.
Step 4: Leave the Cup in Place (Retention Time)
Leave the cup in place for 5 to 15 minutes. For your first few sessions, start with 5 minutes. As you become experienced, you can extend to 10 or 15 minutes. Never exceed 15 minutes on a single spot — longer retention risks blistering the skin and damaging the tissue. During this time, you should feel a firm, warm pulling sensation. The area may tingle as blood rushes to the surface. This is normal and expected.
Step 5: Remove the Cup
To remove the cup, simply press the release valve on top of the cup. Air rushes in, the suction releases instantly, and the cup lifts off easily. Do not pull the cup off without releasing the valve — this can injure the skin. After removal, you will see a circular mark where the cup was. Note the color (see the guide below).
Step 6: Aftercare
After cupping, drink a glass of warm water to help the body clear the released toxins. Keep the cupped area covered and warm — avoid cold wind, air conditioning blowing directly on the area, cold showers, and swimming for at least 4 hours. The pores are open and the body is in a release state, so protect it from cold. Do not cup the same area again until the previous marks have fully faded.
4. Where to Place the Cups
Cupping is most commonly applied to the back, shoulders, and neck — the areas where muscle tension and cold accumulate most. Here are the standard placements for common complaints.
| Complaint | Where to Place Cups | Cup Size |
|---|---|---|
| Upper back & shoulder tension | On the trapezius muscle (top of shoulders) and between the shoulder blades | Large / Medium |
| Lower back pain | On either side of the lower spine, on the large muscles (erector spinae) | Large |
| Neck stiffness | On the back of the neck, below the skull, on the thick muscles | Small |
| Early-stage cold | On the upper back, between and around the shoulder blades (Bladder meridian) | Large / Medium |
| Arm or leg soreness | Directly on the sore or knotted muscle belly | Medium / Small |
5. Reading the Marks: What the Colors Mean
One of the most fascinating aspects of cupping is that the marks it leaves are diagnostic. The color of the mark tells you about the state of the tissue beneath. This is not mysticism — it is the same principle as reading a bruise, except cupping marks reveal stagnation rather than injury.
| Mark Color | What It Means | How Long It Lasts |
|---|---|---|
| Pale pink or light red | Healthy tissue with good circulation; little or no stagnation. A good sign. | 1 to 2 days |
| Bright red | Recent stagnation or mild heat in the area. The blood is actively trying to move through. | 3 to 5 days |
| Dark red or purplish red | Moderate blood stasis — chronic tension or a recent buildup of lactic acid in the muscle. | 5 to 7 days |
| Dark purple, nearly black | Severe, long-standing blood stasis; deep cold or old injury. This area needs repeated treatments. | 7 to 10 days |
| Pale or white mark with little color | Qi deficiency or cold in the area. The body's energy is too weak to bring blood to the surface. | 2 to 3 days |
| Blister or water-filled bubble | Excess damp in the body OR the suction was too strong / time too long. Stop cupping this area. | — |
As you cup the same area over multiple sessions (always waiting for marks to fade first), you will notice the colors getting progressively lighter. A spot that was dark purple on the first session may become bright red on the second and pale pink on the third. This is the stagnation clearing and the tissue healing — visible proof that the therapy is working.
6. The Benefits of Cupping
Relieves Muscle Pain and Knots
Cupping is one of the most effective therapies for myofascial trigger points — the stubborn knots in the neck, shoulders, and back that massage can temporarily relieve but never fully resolve. The upward suction lifts the fascia and muscle fibers apart, breaking the cycle of spasm that keeps the knot locked in place. Studies have confirmed cupping's effectiveness for chronic neck and back pain.
Promotes Blood Circulation
The vacuum draws a surge of fresh blood into the area, delivering oxygen and nutrients while clearing metabolic waste. This increased circulation persists for hours after the cups are removed, accelerating the healing of tired, overworked muscles.
Draws Out Cold and Damp
In TCM, many chronic aches — especially lower back pain that worsens in cold or damp weather — are caused by cold and damp pathogens lodged deep in the muscles. Cupping physically pulls these pathogens to the surface to be expelled. This is why cupping is particularly valued in winter and in damp climates.
Releases Fascia and Connective Tissue
The connective tissue (fascia) that wraps every muscle can become adhered and tight, restricting movement and causing pain. The lifting action of cupping separates these layers, restoring glide between tissues. Sliding cupping — moving an oiled cup along the muscle — is especially effective for fascial release.
7. Safety, Contraindications, and Where Never to Cup
- The abdomen and lower back during pregnancy — cupping here can stimulate the uterus.
- The face — the skin is too thin and delicate; facial cupping requires special small silicone cups and training.
- Directly on the spine — cup on the muscles beside the spine, never on the bony vertebrae themselves.
- Over major arteries — the carotid artery in the neck, the femoral artery in the groin, the popliteal artery behind the knee.
- Broken, cut, or abrasioned skin — wounds, scratches, and recent scars.
- Varicose veins and spider veins — the weakened vessels can be damaged.
- Moles, skin tags, or birthmarks — cup around them, never over them.
- The inner wrist, inner elbow, and armpit — too many nerves and vessels near the surface.
- Pregnant women — especially in the first trimester and never on the abdomen or lower back.
- People on blood thinners (warfarin, aspirin, etc.) or with bleeding disorders — cupping increases surface bleeding and bruising.
- People with fragile or thin skin — the elderly, those on long-term steroids, or anyone with easy bruising.
- People with skin conditions — eczema, psoriasis, or dermatitis in the area to be cupped.
- People with high fever, convulsions, or severe dehydration.
- Children under 7 — their skin is too delicate; consult a practitioner first.
- Anyone who has eaten a heavy meal in the last hour or is very fatigued.
8. Buying Your Cupping Set
| Item | Where to Buy | What to Look For |
|---|---|---|
| Vacuum cupping set with pump | Amazon (search "vacuum cupping set with pump") | A set of 12 to 24 cups in multiple sizes with a hand pump and extension tube. Brands like Lure, KANGZHU, and Hwato are reliable. Expect to pay $15 to $30. |
| Silicone cupping set | Amazon, iHerb | Soft silicone cups you squeeze to create suction. Good for sliding cupping and sensitive areas. No pump needed. |
| Massage oil | Any pharmacy or grocery store | Sweet almond, jojoba, or a simple massage oil. Needed only for sliding cupping. |
Amazon tip: The most popular home sets are the 12-cup and 24-cup Chinese-made vacuum sets (often branded KANGZHU or sold under various names). They are inexpensive ($15–$25), durable, and include the extension tube for self-cupping on the back. Read reviews to confirm the pump holds suction well and the valves release cleanly.
Frequently Asked Questions
Is cupping safe to do at home?
Yes — cupping is safe at home when you use a vacuum cupping set with a hand pump rather than fire cups. Vacuum cups eliminate the burn risk of fire cupping while producing the same therapeutic suction, and they let you control the suction level precisely and release it instantly with a valve. The key safety rules are: never leave cups on longer than 10 to 15 minutes, never cup over broken skin, never cup the abdomen during pregnancy or over major arteries, the face, or directly on the spine. Start with light suction (2 pump strokes) and shorter times (5 minutes), and stop immediately if you feel sharp pain. If you want to try fire cupping, seek hands-on training from a qualified practitioner first.
How long do cupping marks last?
Cupping marks typically last 3 to 10 days, depending on their color and your circulation. Light pink or red marks — which indicate healthy tissue with mild stagnation — fade within 2 to 4 days. Darker purple or nearly black marks — which indicate deeper, long-standing blood stasis, cold, or old injury — can take 7 to 10 days to fully disappear. The marks are painless to the touch and are not bruises in the injury sense; they are the result of stagnant blood being drawn to the surface. As you cup the same area over multiple sessions (always waiting for the previous marks to fade first), the marks become progressively lighter — a visible sign that the stagnation is clearing.
What is the difference between fire cupping and vacuum cupping?
Both methods create the same therapeutic suction, but they do it differently. Fire cupping uses a flaming cotton ball to heat the air inside a glass cup; as the air cools, it contracts and creates the vacuum. Vacuum cupping uses a hand pump to mechanically remove air from a plastic or silicone cup through a one-way valve. The therapeutic effect on the muscle and tissue is the same. The difference is safety and control: vacuum cupping has no open flame and no burn risk, lets you dial in the exact suction level by counting pump strokes, and releases instantly with a valve press. Fire cupping requires skill to avoid burns and gives you a fixed, uncontrollable suction. For home use, we strongly recommend vacuum cupping sets.
Can I cup myself or do I need a partner?
You can cup many areas yourself, especially with a vacuum set that includes an extension tube. The shoulders, upper back, arms, and legs are all reachable for self-cupping. The tube connects the pump to the cup so you can place a cup on your own mid-back or lower back and pump it from a comfortable position. The areas that are hardest to reach alone are the exact center of the back and the lower back — a partner makes these easier, but the extension tube makes even these possible. Always err on the side of lighter suction and shorter times when cupping yourself, and use a mirror to check placement. Never attempt fire cupping alone.
This article is for educational purposes only and does not constitute medical advice. Cupping is a traditional therapy and is not intended to diagnose, treat, cure, or prevent any disease. Always consult a qualified healthcare provider before beginning cupping, especially if you are pregnant, have a bleeding disorder, take blood-thinning medication, have a skin condition, heart disease, or any serious medical condition. Discontinue use and seek medical attention if you experience blistering, severe pain, dizziness, or skin infection. Read our full disclaimer →