Key Takeaways
- The 24-form, also called the Beijing short form, is a simplified Yang-style tai chi sequence created in 1956 and is the most widely practiced tai chi form in the world.
- It is divided into three sections of eight movements each, progressing from basic weight shifts to more complex kicks and balanced postures.
- Each movement is built on the same principles: relaxed body (song), rooted feet, waist-led motion, circular arm paths, and coordinated abdominal breathing.
- Beginners should learn section by section, practicing each movement until it feels natural before progressing, typically over 3 to 6 months.
- This guide describes every movement with body position, weight distribution, hand placement, and breathing cue, so you can practice even without a video.
What Is the 24-Form Tai Chi?
The 24-form tai chi, officially known as the Simplified Tai Chi Chuan, was created in 1956 by the Chinese Sports Committee. A panel of master teachers distilled the traditional Yang-style long form of 103 movements down to 24 essential movements, removing repetitions and the most physically demanding sequences while preserving the characteristic style: slow, even, gentle, and continuous. The result was a form that could be learned by ordinary people in a reasonable time and practiced in a small space, roughly 4 by 4 meters.
Today the 24-form is the global standard for tai chi instruction. It is the form taught in community centers, hospitals, and university wellness programs worldwide, and the form most clinical studies use. If you take a beginner tai chi class anywhere on earth, you will very likely be learning this form.
From a Traditional Chinese Medicine perspective, the 24-form is a complete qigong practice. Its continuous, circular movements circulate qi through all twelve regular meridians, the slow breathing gathers and stores qi in the dantian, and the mental focus calms the shen (spirit). Regular practice nourishes yin and yang balance, strengthens the spleen and kidneys through the leg work, and opens the chest to benefit the lung and heart.
Foundations Before You Begin
Before attempting any movement, set your foundation. These checkpoints apply to every posture in the form:
- Head suspended: Imagine a thread lifting the crown of your head. Tuck the chin slightly. This lengthens the spine and aligns the head over the body.
- Tongue on the palate: Rest the tongue gently behind the upper front teeth. This connects the ren mai (conception vessel) and du mai (governing vessel), allowing qi to circulate in the microcosmic orbit.
- Shoulders dropped, elbows sunk: Relax the shoulders down and slightly back. Let the elbows hang heavy. Tension here blocks qi from reaching the hands.
- Chest soft, back rounded: Do not puff the chest out. Let it be slightly concave, which opens the back and allows deeper abdominal breathing.
- Knees soft, weight in the feet: Never lock the knees. Keep them softly bent so weight can sink into the soles of the feet, establishing root.
- Breathing abdominal: Breathe through the nose. The lower abdomen expands on inhale and retracts on exhale. Generally, gather energy on inhale, express or sink on exhale.
Each movement below is described as a sequence of body positions. Read the whole movement once, then practice it slowly, repeating the steps aloud or in your mind. Weight percentages tell you how much of your body weight rests on each leg. "Bow stance" means the front knee is bent over the front foot with 70 percent weight forward; "empty stance" means the back leg bears 90 percent with the front foot lightly touching. Aim to learn one or two movements per session, not the whole form at once.
Opening: Commencement (Qi Shi)
The opening establishes your posture, breath, and intention. It is the most important movement in the form because it sets the quality of everything that follows.
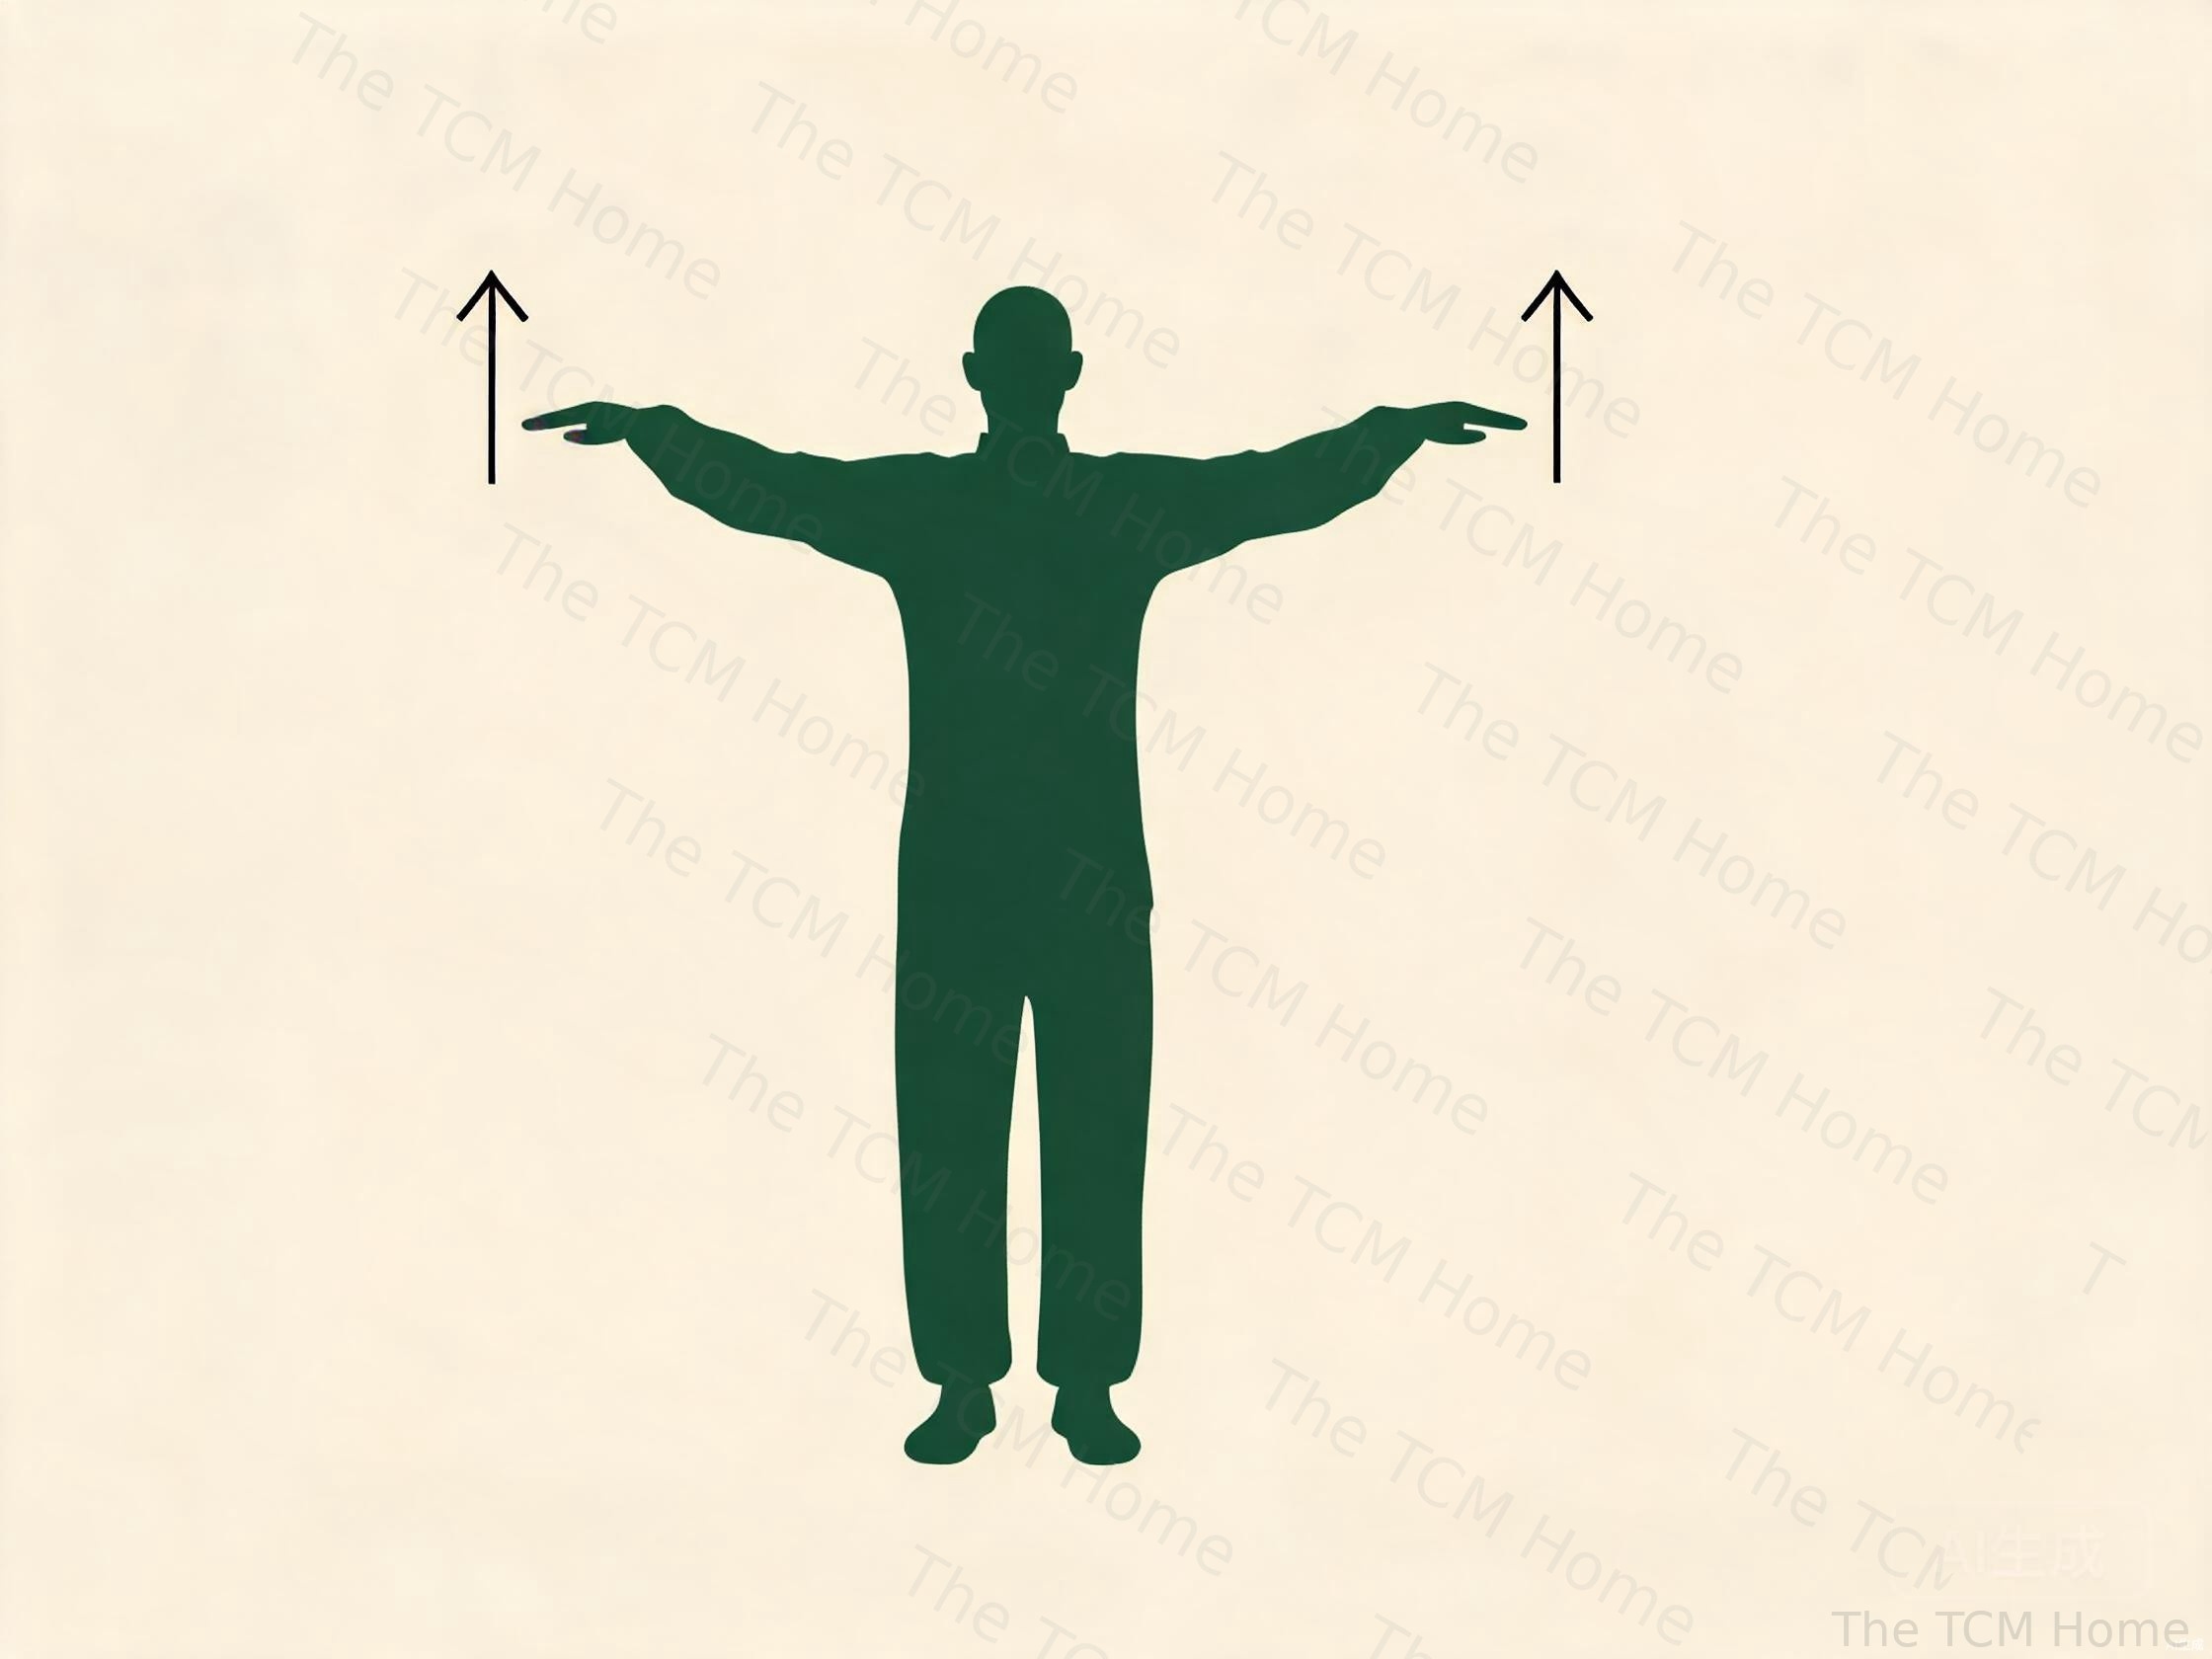
- Stand with feet together, arms relaxed at the sides, palms facing the body. Take three slow breaths to settle the mind.
- Shift weight onto the right leg. Step the left foot to the side, shoulder-width apart, touching the toes first, then the whole foot. Distribute weight evenly, 50/50. Toes point forward.
- Slowly raise both arms forward and upward, palms facing down, to shoulder height. Inhale through this rise, about 4 to 6 seconds. The arms feel as though lifting through water; elbows stay slightly bent, shoulders stay down.
- Turn the palms to face downward, bend the knees slightly, and slowly press the arms back down to the sides, exhaling for 4 to 6 seconds. Feel the weight settling into the feet and the dantian.
- The knees remain softly bent at the end; do not stand fully upright. This slight knee bend is your working posture for the entire form.
Part 1: Movements 1 to 8
1. Commencement (Qi Shi)
As described above. End with feet shoulder-width apart, knees soft, arms at the sides, weight 50/50.
2. Part the Wild Horse's Mane, Left and Right (Ye Ma Fen Zong)
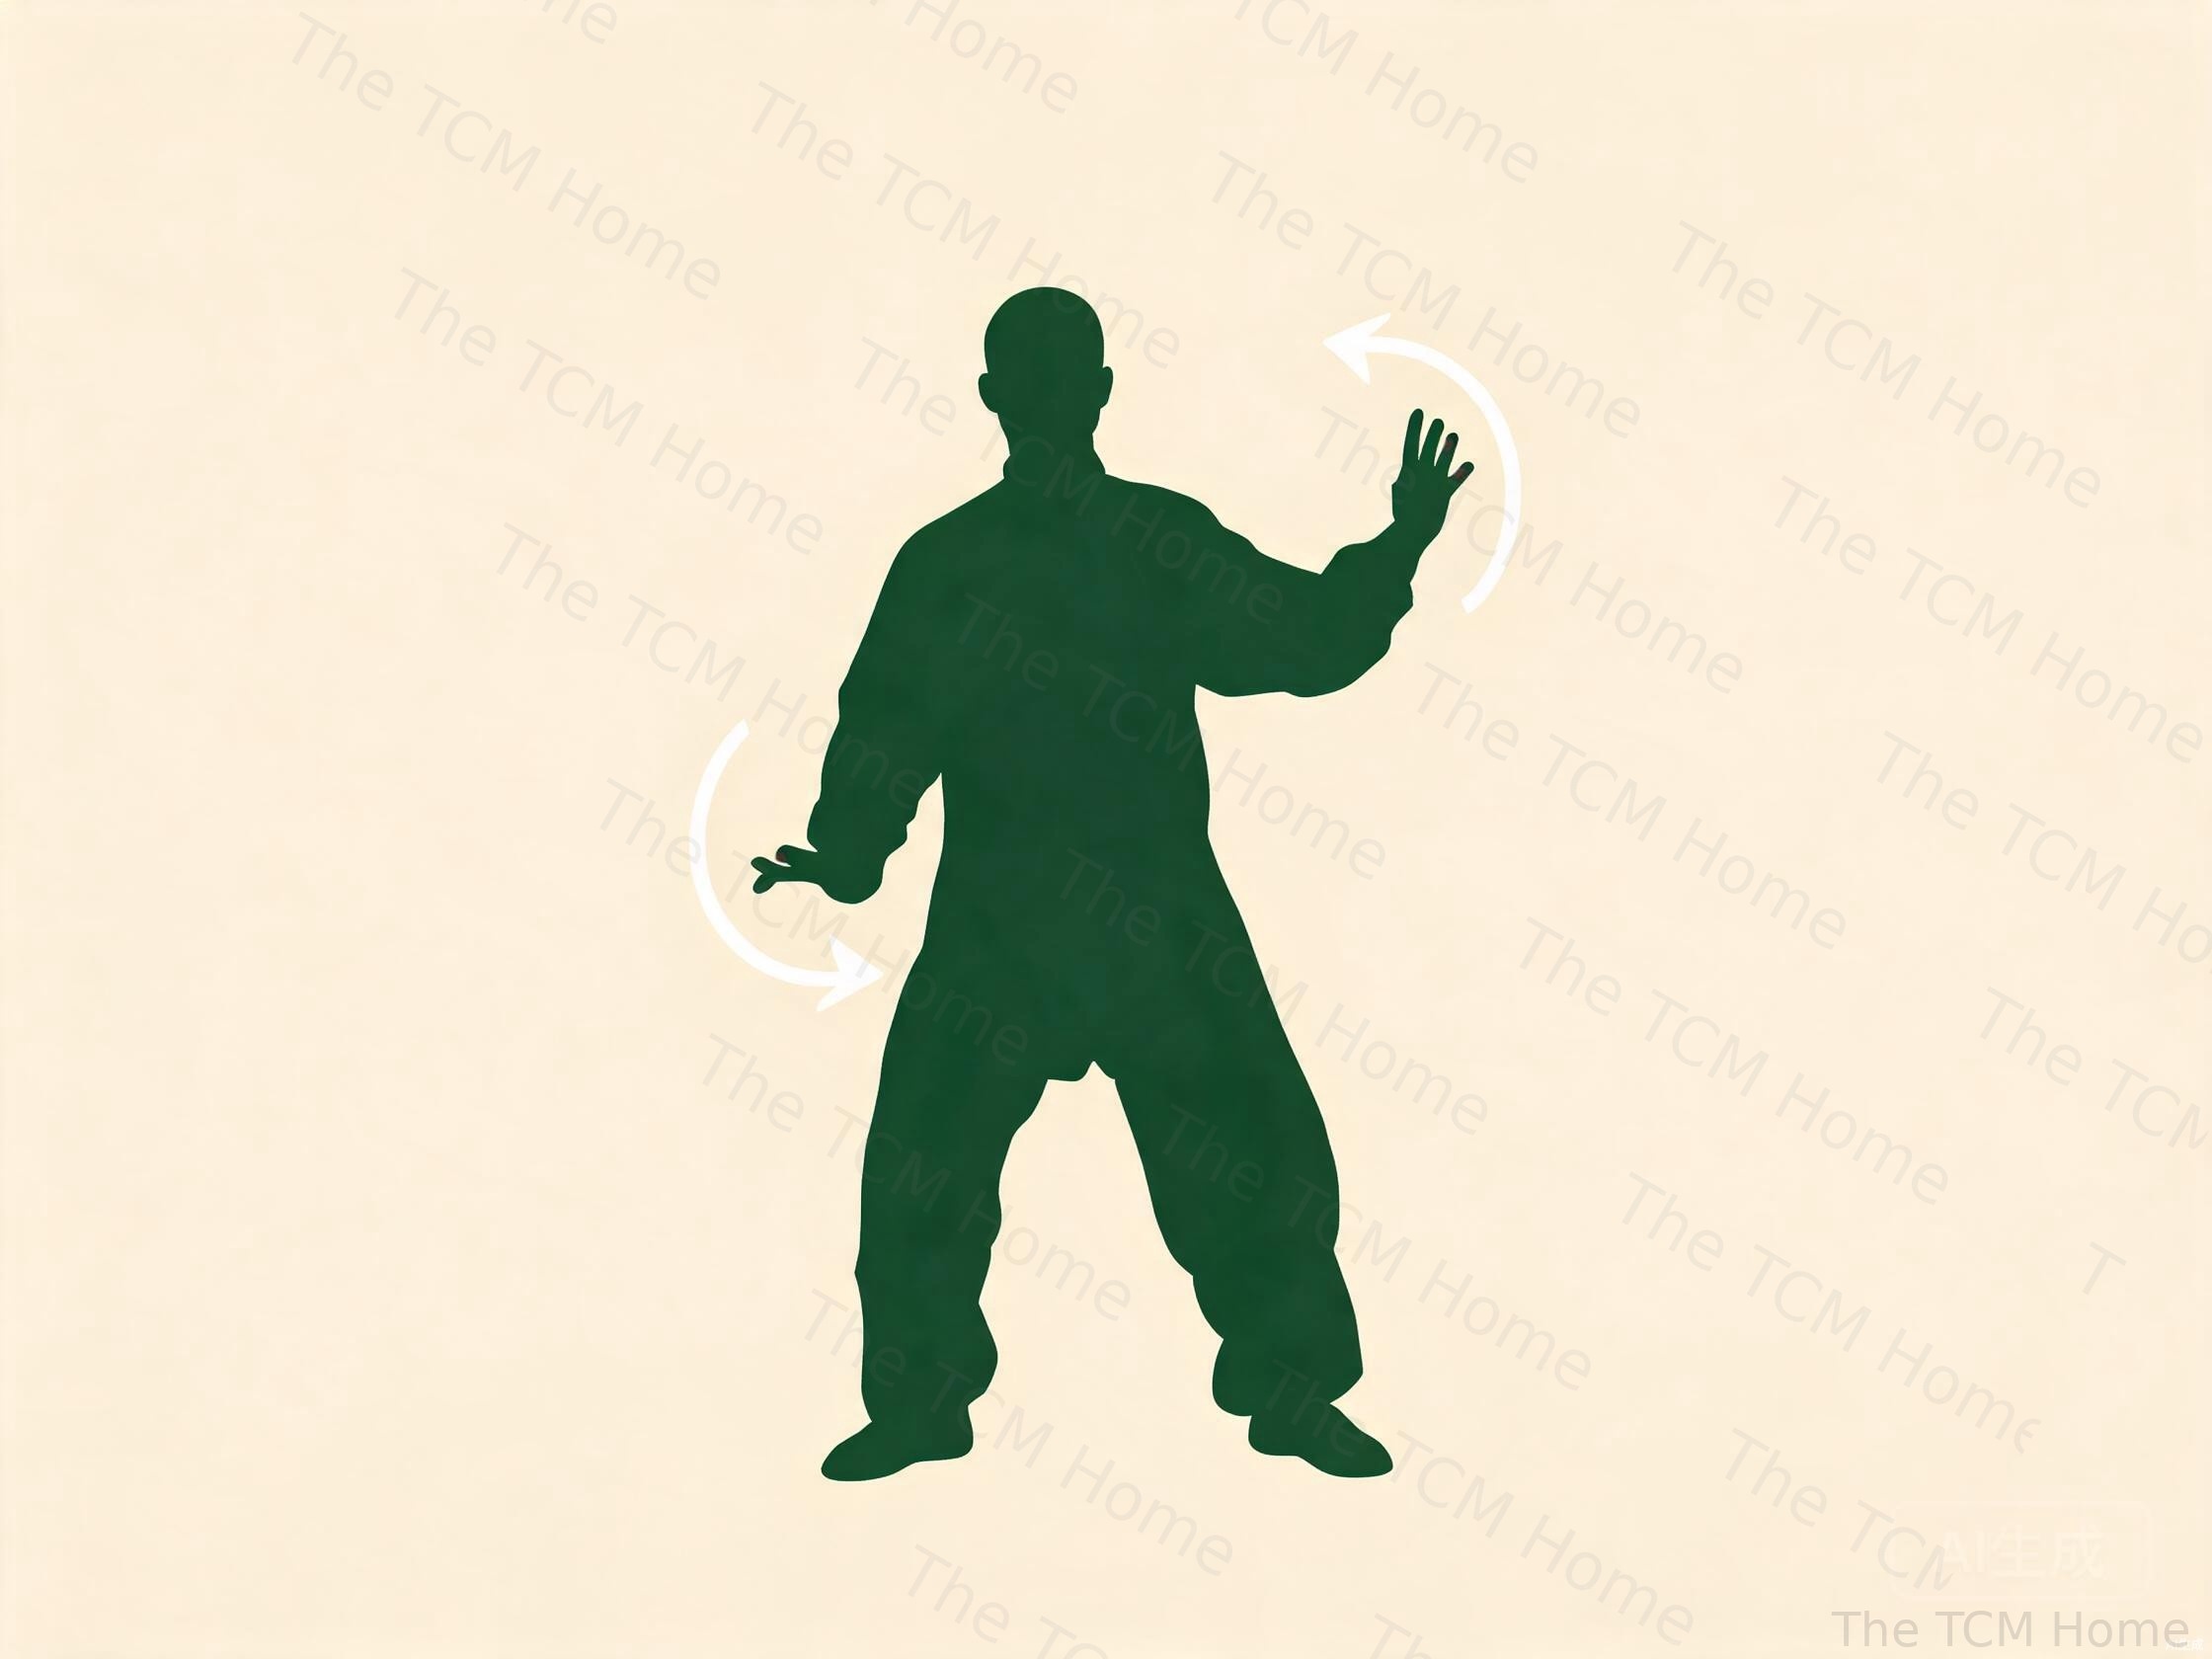
This introduces the bow stance, weight shifting, and waist-led arm movement. The image is parting a horse's flowing mane with both hands.
- From commencement, shift weight to the right leg. Turn the waist slightly right and bring both arms across the body to the right, the right arm upper at shoulder height (palm down), the left arm lower at hip height (palm up), as if holding a small ball on the right side.
- Step the left foot forward and to the left at a 45-degree angle, heel first, into a left bow stance. As you step, shift weight slowly onto the left leg until 70 percent is forward.
- As the weight shifts forward, part the arms: the left hand rises forward and up to shoulder height, palm facing up and outward; the right hand presses down and back to the right hip, palm facing down. The movement is driven by the waist turning gently left.
- Shift weight back to the right leg, turn the waist right, and bring the arms back to the right-side ball-holding position (now the left arm is upper, right arm lower, ball on the right). Step the right foot forward next to the left ankle, then out to the right at 45 degrees, heel first.
- Shift weight onto the right leg into a right bow stance. Part the arms oppositely: the right hand rises forward and up, the left hand presses down to the left hip.
- Repeat the left and right pattern two more times, traveling forward in a zigzag.
Breathing: Inhale as you gather the ball and step; exhale as you shift weight forward and part the arms.
3. White Crane Spreads Its Wings (Bai He Liang Chi)
A graceful posture that opens the chest and trains single-leg balance in a gentle way.
- From the last right bow stance, shift weight back onto the left leg. Turn the waist slightly left and bring both hands in front of the chest, the right hand above (palm down) and the left hand below (palm up), as if holding a ball on the left.
- Step the right foot half a stride forward, touching only the toes to the ground (empty stance, 90 percent weight on the left leg).
- As you settle into the empty stance, open the arms: the right hand rises up and slightly forward to forehead height, palm facing inward as if shading the eyes; the left hand presses down to beside the left hip, palm facing down. The chest opens gently.
- The body faces forward, weight rooted in the back left leg. Hold for a moment, breathing naturally.
4. Brush Knee and Twist Step, Left and Right (Lou Xi Ao Bu)
A forward-stepping movement that trains the bow stance and a pushing hand, repeated three times.
- From White Crane, shift weight forward slightly onto the right foot and step the left foot forward, heel first, into a left bow stance.
- As you step, the right hand draws back past the ear, elbow sinking, palm facing forward; the left hand circles down and across the left knee as if brushing it, palm facing down.
- As weight shifts forward onto the left leg (70 percent), push the right hand forward at shoulder height, palm forward, while the left hand finishes brushing past the knee to rest at the left hip, palm down. The push comes from the waist and back leg, not the shoulder.
- Shift weight back to the right leg. Step the right foot forward, heel first. Brush with the right hand, push with the left. Repeat once more, brushing and pushing with alternating hands, traveling forward.
Breathing: Inhale drawing the hand back and brushing down; exhale shifting forward and pushing.
5. Hand Strums the Lute (Shou Hui Pi Pa)
A balanced, empty-stance posture that trains fine arm control and the feeling of holding an object.
- From the last brush knee (right foot forward), shift weight forward onto the right leg, then step the left foot half a stride forward, toes touching only, into a left empty stance (90 percent weight on the right).
- As you settle, raise both hands in front of the chest: the left hand forward at chest height, palm facing the body; the right hand drawn back near the right elbow, palm facing down. The image is holding a lute (pipa), the left hand on the strings, the right hand ready to pluck.
- The elbows sink, shoulders relax, weight settles into the back leg. Hold, breathing naturally.
6. Step Back and Whirling Arms, Left and Right (Dao Juan Gong)
A backward-stepping movement that opens the shoulders and trains reverse weight shifting. Repeated three times.
- From Hand Strums the Lute, shift weight onto the left leg. Step the right foot backward, landing on the toes first, then the whole foot. As you step back, turn the right palm upward and draw the right hand back and up in a vertical circle past the right ear, then forward to shoulder height, palm forward.
- Shift weight back onto the right leg (now 70 percent on the right). As you shift, the left hand circles down and back, palm turning up, drawing back past the left ear, then pushing forward at shoulder height. The right hand presses down to beside the right hip.
- Step the left foot back. Repeat the whirling arm motion with the left hand drawing back and the right hand pushing forward.
- Continue stepping back three times total, alternating which hand pushes forward. The body moves backward but the energy projects forward.
7. Grasp the Sparrow's Tail, Left (Zuo Lan Que Wei)
One of the most important movements in Yang tai chi, containing four energies: ward off (peng), roll back (lu), press (ji), and push (an). It encapsulates the core combat and health principles of the style.
- From the last step-back, shift weight onto the right leg. Step the left foot forward, heel first, into a left bow stance.
- Ward off (peng): As weight shifts forward, raise the left forearm to chest height, bent at the elbow, palm facing the body. The right hand rests at the right hip, palm down. The left arm forms a rounded, buoyant shape, as if a balloon presses against it.
- Roll back (lu): Shift weight back onto the right leg. Turn the waist right. Both hands turn palms down and sweep to the right rear in an arc, the left hand leading, as if deflecting an incoming force to the side.
- Press (ji): Shift weight forward onto the left leg again. Bring the right hand forward to meet the inside of the left wrist. Press both arms forward together at chest height, the right wrist pressing against the left forearm, palms facing inward.
- Push (an): Shift weight back slightly. Both hands lift and separate to shoulder width, palms facing forward. Then shift weight forward onto the left leg and push both hands forward at shoulder height, arms rounded, as if pressing a large ball away.
Breathing: Inhale on ward off and roll back (gathering), exhale on press and push (expressing).
8. Grasp the Sparrow's Tail, Right (You Lan Que Wei)
The same four energies performed on the right side, with a transition turn.
- From the left Grasp the Sparrow's Tail push, shift weight back onto the right leg. Turn the waist to the right, pivoting the left toes inward. The hands turn with the body.
- Shift weight onto the left leg. Step the right foot forward, heel first, into a right bow stance.
- Perform ward off with the right forearm raised, roll back shifting to the left leg, press with the left wrist against the right forearm, and push with both hands forward, exactly mirroring the left side.
If you learn nothing else from the 24-form, master Grasp the Sparrow's Tail. Its four energies, ward off, roll back, press, and push, contain the essence of Yang-style tai chi and appear throughout the rest of the form. Spend a week on this movement alone before moving on.
Part 2: Movements 9 to 16
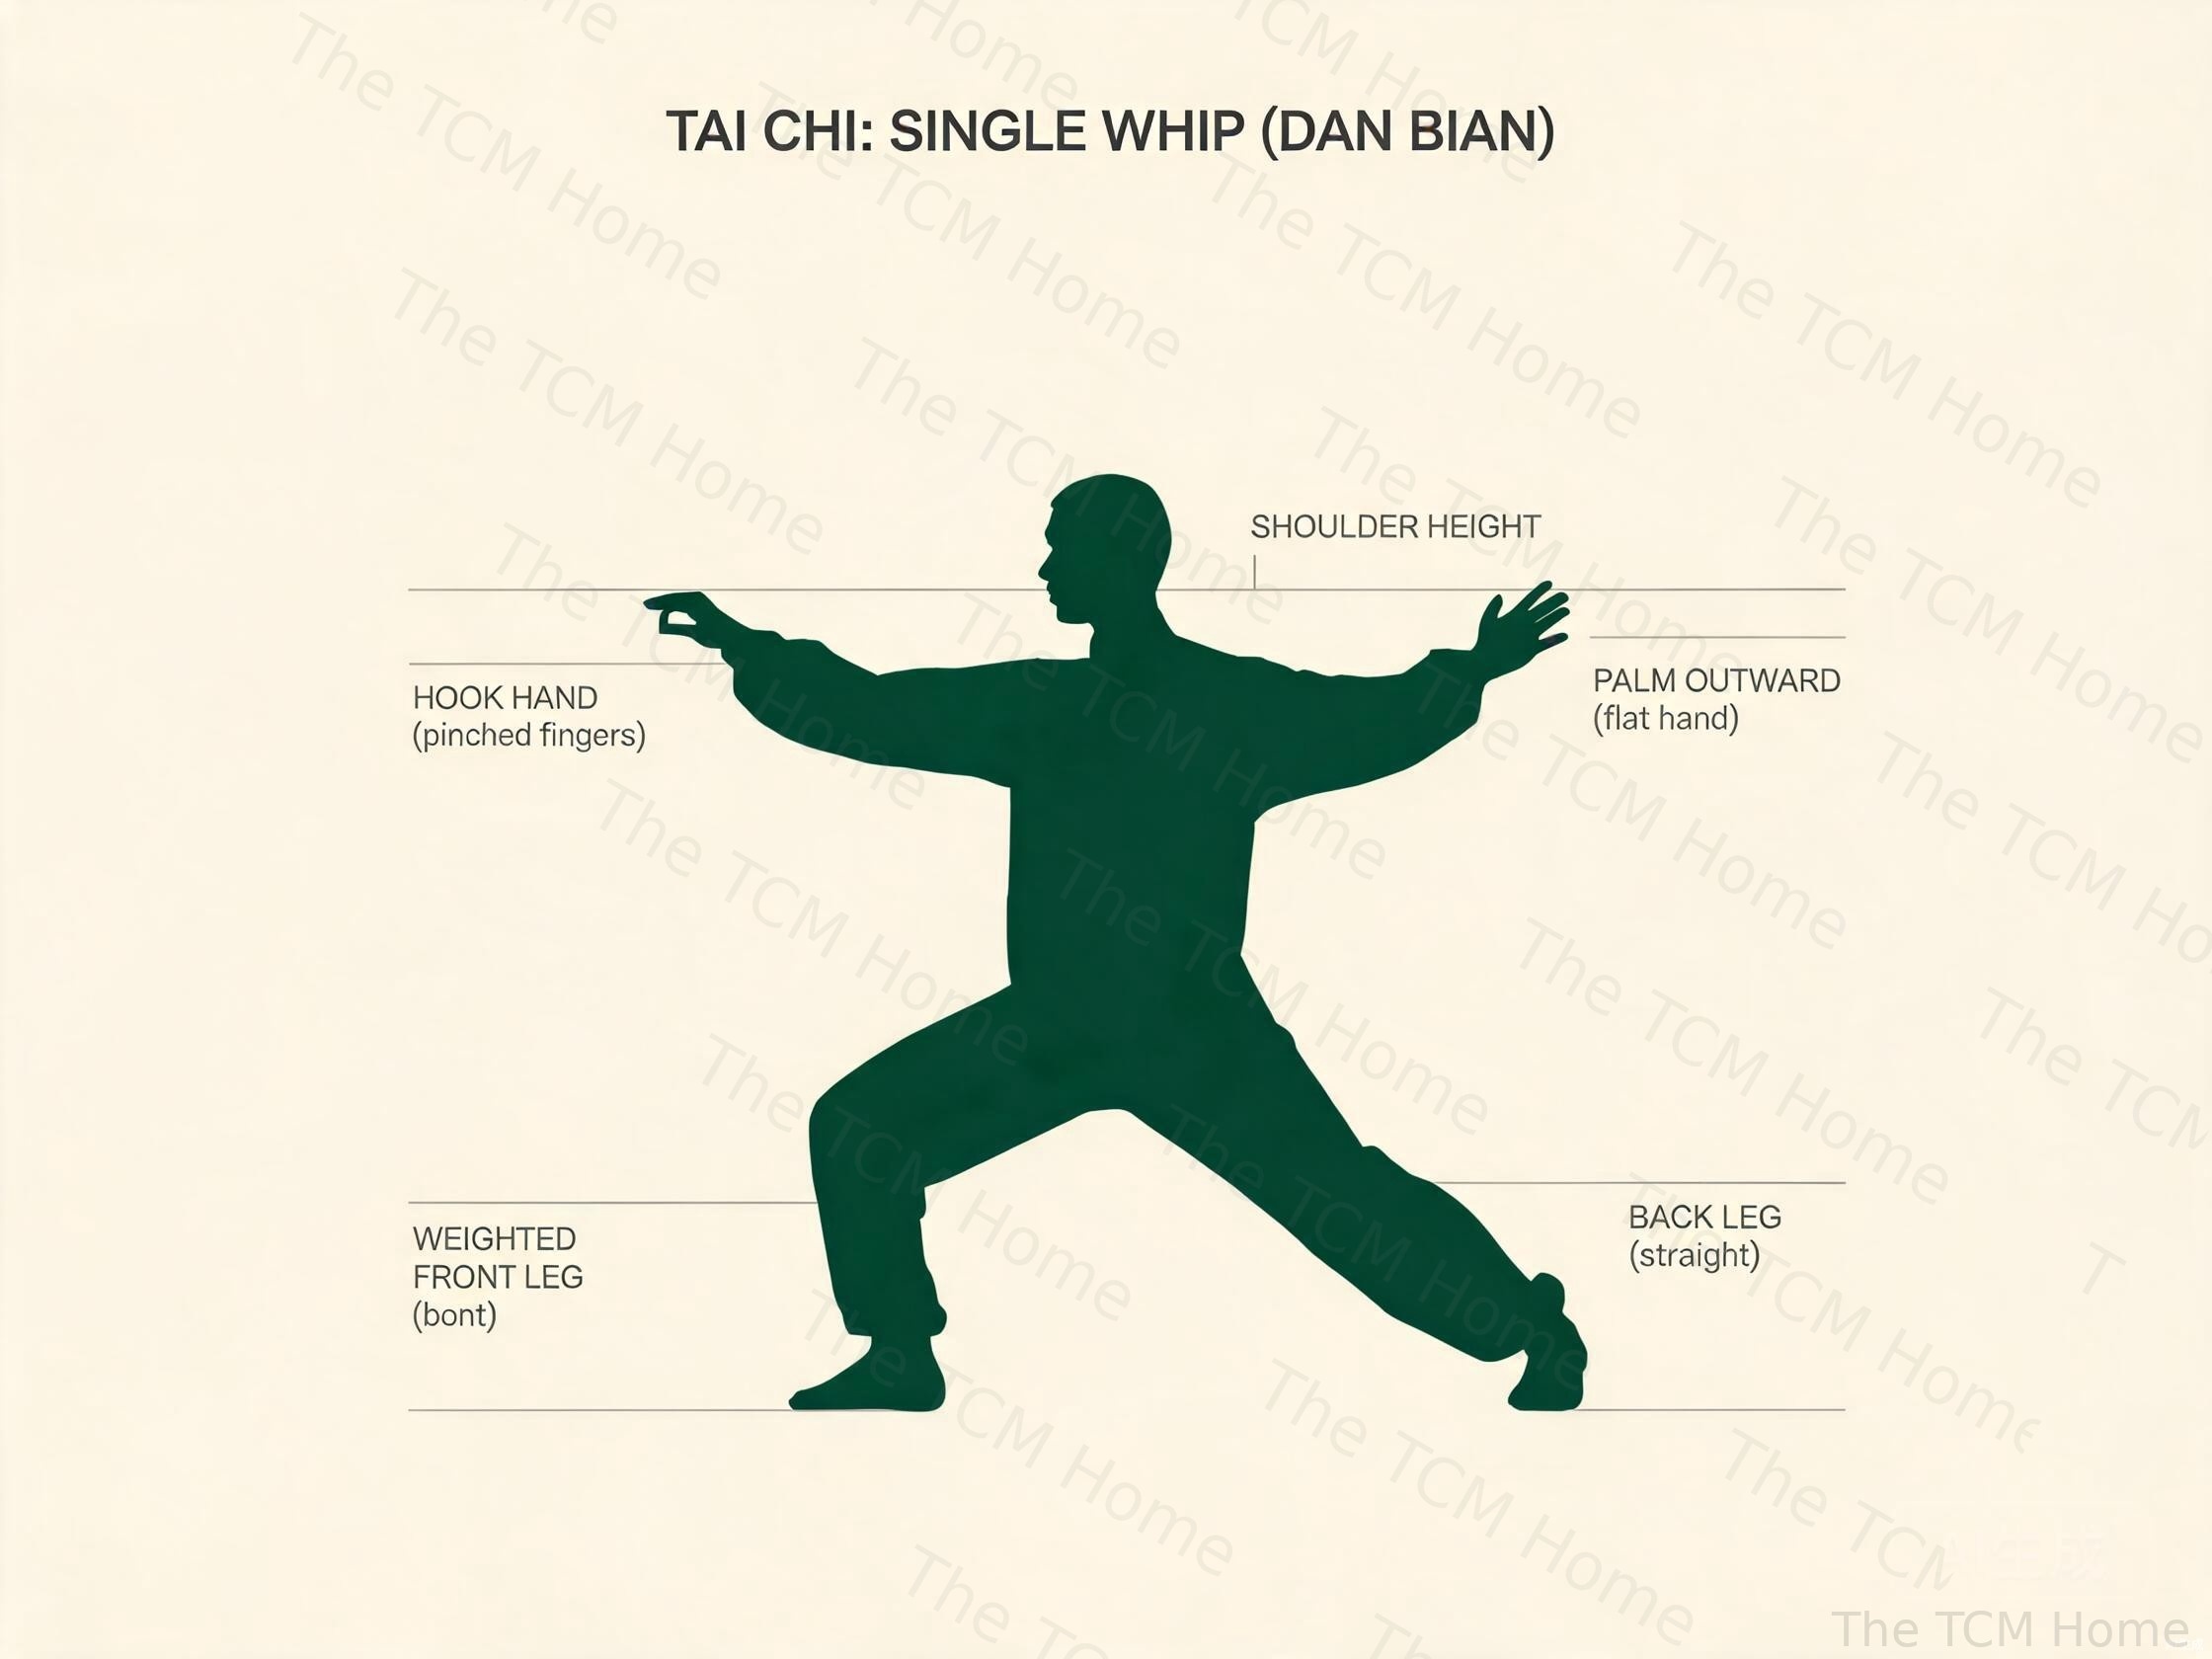
9. Single Whip (Dan Bian)
A signature Yang posture that opens the side body and trains a single-arm extension. The "hook" hand resembles a bird's beak.
- From the right Grasp the Sparrow's Tail, shift weight back onto the left leg and turn the waist to the left. Both hands come together in front of the chest, palms facing each other.
- As you turn, all five fingers of the right hand pinch together to form a "hook" (gou), wrist drooping down like a hanging flower.
- Shift weight onto the right leg. Slide the left foot to the left, landing on the heel, then the whole foot, into a wide horse-ish bow stance facing left.
- As weight shifts left, the left hand arcs across the body at chest height, palm turning outward, and pushes to the left at shoulder height. The right hook hand stays extended to the right at shoulder height. The body faces left, arms extended in a wide horizontal line.
10. Wave Hands Like Clouds, Left and Right (Yun Shou)
A lateral stepping movement that trains continuous waist rotation and flowing arm circles, performed three times to each side.
- From Single Whip, shift weight onto the right leg. Turn the waist right. The left hand drops and circles up across the body to the right, palm facing the body; the right hook opens into a palm facing the body. The hands are stacked, right hand upper.
- Shift weight onto the left leg, turning the waist left. The left hand circles down and to the left; the right hand circles up and to the left, as if turning a large vertical wheel in front of the chest.
- As the weight reaches the left leg, step the right foot half a step to the left, placing it beside the left.
- Shift weight onto the right leg, turning the waist right, continuing the hand circles so the right hand descends and the left hand rises on the right.
- Step the left foot half a step to the left again. Continue three full cycles, moving slowly to the left across the floor.
Breathing: Inhale as the rising hand comes up; exhale as it crosses down. The breath follows the wheeling arms.
11. Single Whip (Dan Bian)
The same posture as movement 9, transitioning out of Cloud Hands.
- After the last Cloud Hands cycle (weight on the left), shift weight to the right leg and form the right hand into a hook.
- Step the left foot to the left, heel first, and shift into a left bow stance, pushing the left palm out to the left as before.
12. High Pat on Horse (Gao Tan Ma)
A light, balanced empty-stance posture that trains fine hand and foot coordination.
- From Single Whip, shift weight forward onto the left leg. The right hook hand opens into a palm.
- Step the right foot half a stride forward, toes touching only, into a right empty stance (90 percent weight on the left).
- As you settle, the right hand draws back past the right ear, palm facing forward; the left hand circles forward to chest height, palm facing up. The image is gently patting a horse's neck with the left hand while the right hand holds the reins near the ear.
13. Kick with Right Heel (You Deng Jiao)
The first kick of the form, training balance and a slow, controlled leg extension.
- From High Pat on Horse, shift weight onto the right leg and step the left foot to the left, landing on the heel, then shifting into a left bow stance facing left.
- Bring both hands together in front of the chest, palms facing each other, then cross them at the wrists, left hand outside.
- Shift all weight onto the left leg. Slowly lift the right foot and extend the right leg forward, kicking with the heel. The kick is slow and controlled, not snapping.
- Simultaneously, separate the hands outward to the sides at shoulder height, palms facing outward, arms in a wide horizontal line. The body stands tall on the left leg, balanced.
- Lower the right foot down with control, landing heel first, ready for the next movement.
14. Strike Ears with Both Fists (Shuang Feng Guan Er)
A forward-stepping movement with both hands formed into fists, striking toward the temples.
- From the kick, shift weight forward onto the right leg into a right bow stance.
- As you step, drop both hands and form them into fists. Bring both fists upward in arcs from the sides, striking forward and slightly inward at ear height, as if clapping an opponent's ears. The fists are knuckle-to-knuckle, palms facing inward.
15. Turn Body and Kick with Left Heel (Zhuan Shen Zuo Deng Jiao)
A kick performed after a full body turn, training rotational balance.
- From the double fist strike, shift weight back onto the left leg. Pivot 180 degrees to the left on the right heel, the body now facing the opposite direction.
- As you turn, open the fists back to palms and bring both hands to cross at the wrists in front of the chest, right hand outside.
- Shift weight onto the right leg. Slowly lift the left foot and extend the left leg forward, kicking with the heel.
- Simultaneously separate the hands outward to the sides at shoulder height, palms outward. Hold briefly, then lower the left foot with control, landing heel first.
16. Push Down and Stand on One Leg, Left (Zuo Xia Shi Du Li)
A deep posture that trains leg strength, hip mobility, and single-leg balance. Modify the depth if your hips or knees protest.
- From the kick, set the left foot down to the left at a 45-degree angle, shifting into a left bow stance.
- Shift weight fully onto the left leg, bending the knee deeply. The right leg extends straight to the right, foot flat on the floor, toes turned up. The body sinks low over the left leg (a side horse stance).
- Both hands circle: the left hand pushes down beside the left hip, palm down; the right hand rises up in front of the body to shoulder height, palm up.
- Shift weight onto the right leg as you rise, lifting the left knee up in front of the body to hip height (standing on one leg). The left hand pushes up above the head, palm up; the right hand pushes down beside the right hip, palm down.
Movements 13 to 16 are the most physically demanding in the form. If kicks or deep stances cause knee or balance difficulty, keep kicks low (just clearing the floor), reduce stance depth, and use a chair for support on single-leg postures. Correct form at a comfortable depth is always superior to a deep but strained posture.
Part 3: Movements 17 to 24
17. Push Down and Stand on One Leg, Right (You Xia Shi Du Li)
The mirror of movement 16, performed on the other side.
- Set the left foot down to the right. Shift weight onto the right leg and sink into a deep right-side stance, left leg extended straight to the left.
- The right hand pushes down beside the right hip; the left hand rises to shoulder height.
- Rise onto the left leg, lifting the right knee to hip height. The right hand pushes up above the head; the left hand pushes down beside the left hip.
18. Work at Shuttles, Left and Right (Yu Nu Chuan Suo)
A weaving, four-direction stepping movement that trains turning and a rising block-and-strike. Performed to all four corners.
- From the right leg stand, set the right foot down and step forward with the left into a left bow stance facing the front-left corner.
- As you step, raise the left forearm in front of the forehead as a block, palm facing out; the right hand pushes forward at chest height, palm forward. The image is a jade maiden (yu nu) weaving at a loom, blocking with one hand while pressing with the other.
- Shift back, pivot, and step to the right-front corner into a right bow stance, blocking with the right forearm and pushing with the left hand.
- Continue to the right-rear and left-rear corners, weaving the block and push to all four diagonal directions.
19. Needle at Sea Bottom (Hai Di Zhen)
A forward-bending posture that lengthens the spine and arms, training a downward release of energy.
- From the last shuttle, shift weight forward and step the left foot half a stride forward into a left empty stance (90 percent weight on the right).
- Raise both hands forward and up to shoulder height, then turn the waist slightly right and draw the right hand back past the ear.
- Bend forward from the waist, keeping the back long. The right hand extends straight down alongside the right calf, fingers pointing down, as if threading a needle into the seabed. The left hand rests lightly on the left thigh.
- The eyes follow the right hand down. Hold briefly, then rise slowly, stacking the spine vertebra by vertebra.
20. Flash the Arms (Shan Tong Bi)
A rising, opening posture that follows the deep bend of Needle at Sea Bottom.
- Rise from the forward bend, shifting weight onto the left leg into a left bow stance.
- As you rise, the right hand comes forward and up in front of the forehead, palm facing outward as if shielding; the left hand presses forward at chest height, palm forward. The chest opens, arms spread.
21. Turn Body, Deflect, Parry and Punch (Zhuan Shen Ban Lan Chui)
A martial sequence combining a turn, a deflection, and a punch, performed slowly.
- From Flash the Arms, shift weight back onto the right leg. Turn the body 180 degrees to the right, pivoting on the heels.
- As you turn, the right hand circles down and out to deflect, then the left hand parries inward.
- Step the right foot forward into a right bow stance. As weight shifts forward, the right hand forms a fist and punches forward at chest height, knuckles up. The left hand pulls back to beside the right elbow, palm facing down, as if guarding.
22. Apparent Close-Up (Ru Feng Si Bi)
A withdrawing and closing posture that gathers energy before the final push.
- From the punch, open the right fist back to a palm. Shift weight back onto the left leg, drawing both hands back toward the chest, palms facing forward, as if receiving and absorbing an incoming force.
- The elbows sink, the chest softens. Energy gathers in the dantian.
23. Cross Hands (Shi Zi Shou)
A posture that crosses the wrists in front of the body, gathering and balancing the energy before closing.
- From Apparent Close-Up, shift weight onto the right leg. Turn the waist to the right, pivoting the left toes inward until the feet are parallel and about shoulder-width apart.
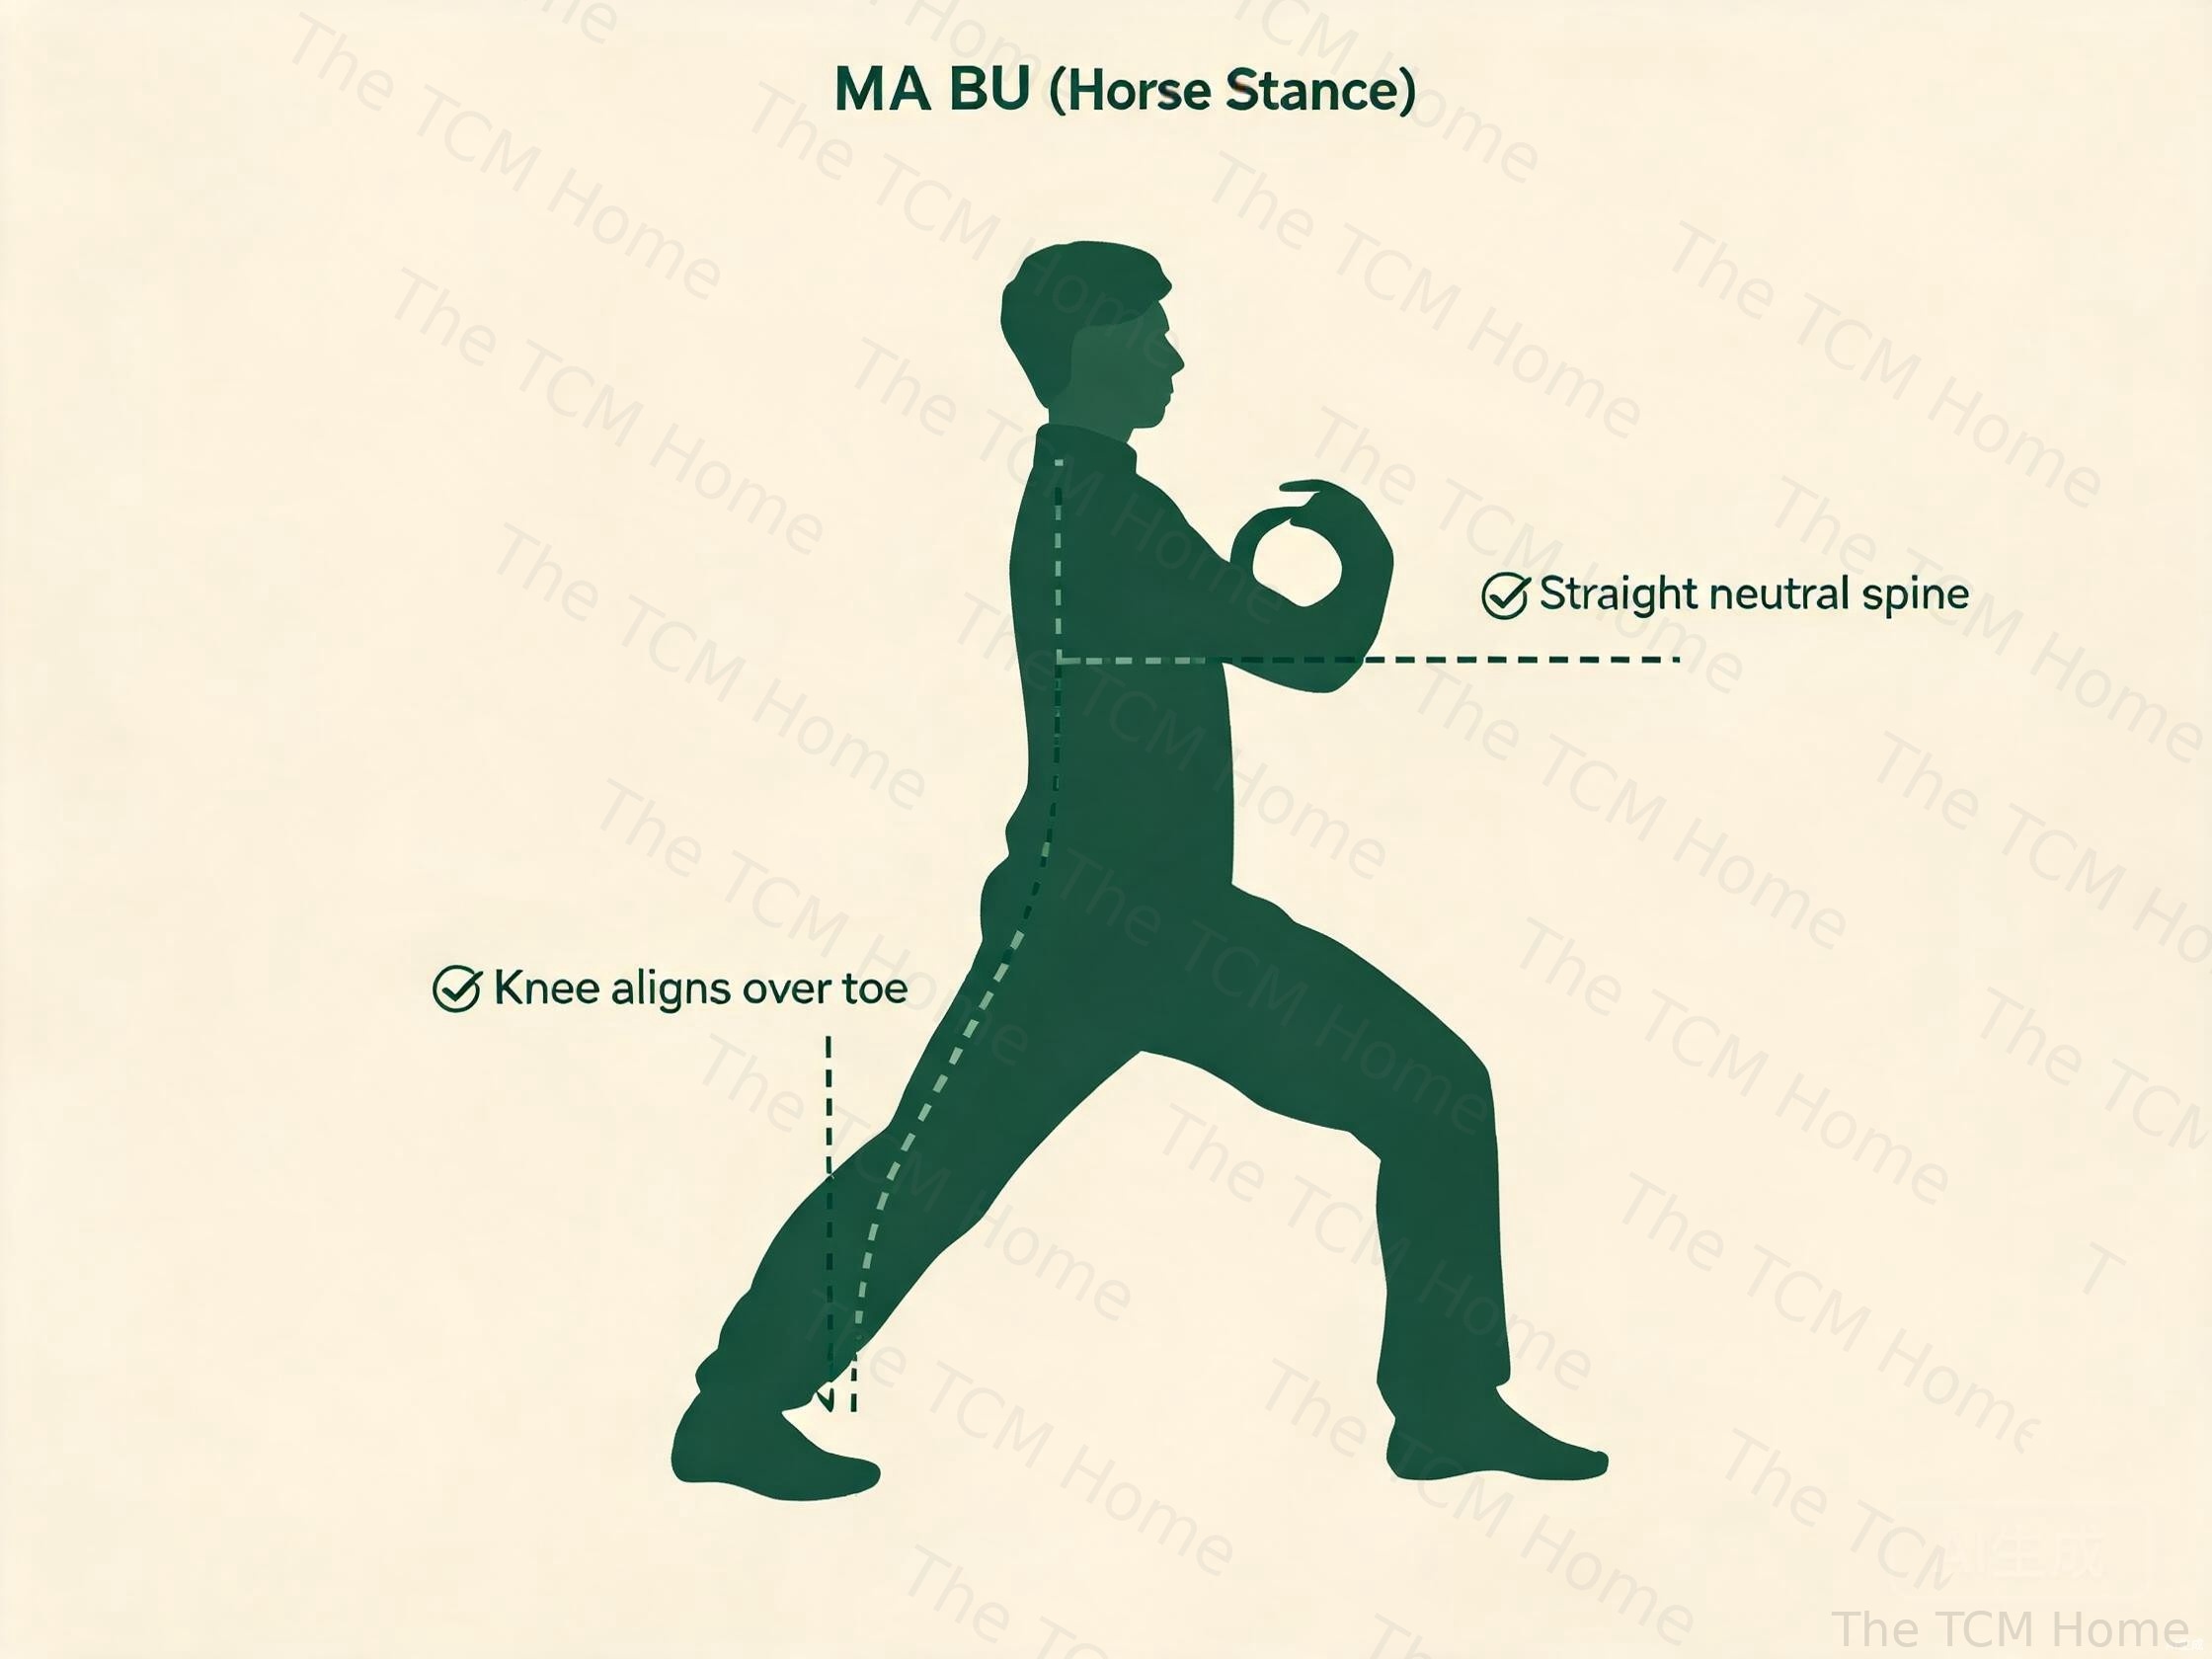
- Sink down, bending the knees into a small horse stance. As you sink, bring both hands down and then up to cross at the wrists in front of the chest, right hand over left, palms facing the body. The crossed hands resemble the character "ten" (shi).
- Rise slightly, weight even, arms still crossed.
24. Closing Form (Shou Shi)
The closing returns the body to stillness and settles the qi gathered during practice.
- From Cross Hands, slowly open the hands and lower them to the sides, palms facing down, as you gradually straighten the legs. This mirrors the Commencement in reverse.
- Bring the hands down to rest at the sides, palms facing the body.
- Shift weight to the right leg. Bring the left foot in to meet the right, feet together. Stand quietly for a moment, breathing naturally, feeling the warmth and settled energy in the body.
- Bow mentally to acknowledge the practice, then go about your day.
Practice Tips for Learning the 24-Form
Learn in Sections
Do not try to memorize all 24 movements at once. Spend 2 to 4 weeks on Part 1 (movements 1 to 8) before adding Part 2. Once the first section flows without conscious effort, your brain has bandwidth for the next. Rushing produces a shaky foundation that is hard to correct later.
Practice Daily, Even Briefly
Fifteen minutes of daily practice outperforms a single two-hour weekly session. The body learns motor patterns through repetition spaced over days, not cramming. If time is short, practice just the movements you are currently learning rather than the whole form.
Use a Mirror or Video
Visual feedback is invaluable. A mirror lets you check alignment, hand height, and weight distribution. A video of an experienced practitioner, played at slow speed, gives you a model to follow. Many free 24-form videos exist online; find one whose pacing and clarity suit you.
Feel the Energy, Don't Just Copy the Shape
The external shape of a movement is only the surface. The real practice is internal: the feeling of qi flowing with the breath, the sense of rootedness in the feet, the waist leading the arms. Cultivate this inner attention from the first day, not after you have "learned the form." A beginner who moves slowly with full attention is practicing tai chi; an expert who moves correctly but with a wandering mind is merely exercising.
Find a Teacher When You Can
This guide gives you the choreography, but tai chi's internal subtleties, the exact angle of a push, the timing of a weight shift, the quality of relaxation, are best transmitted in person. A qualified teacher corrects habits before they harden and shows you things no text can convey. If a local class exists, attend it, even occasionally. If not, online video courses with feedback are a reasonable substitute.
Be Patient with the Kicks and Deep Stances
Movements 13 to 17 challenge balance and leg strength. It is normal to wobble on the kicks and to feel the thighs burning in the deep stances. Keep kicks low, reduce stance depth, and trust that strength and stability come with time. Months of consistent practice transform what once seemed impossible into effortless.
The 24-form is traditionally performed beginning facing north and traveling generally westward, with movements that turn to face all four cardinal directions. Do not worry about compass directions while learning; simply pick a clear space and let the form define your path. Over time you will notice the form's elegant geometry, a slow spiral that returns you to where you began.
The 24-Form as a Lifelong Practice
Learning the choreography of the 24-form is the beginning, not the end. After the sequence is memorized, years of refinement follow: deepening the relaxation, sharpening the intention, smoothing the transitions, cultivating the qi. A practitioner who has done the same 24-form daily for a decade will tell you they are still discovering new layers. This is the nature of internal arts; they are inexhaustible.
The 24-form rewards consistency above all. Ten minutes a day, every day, for a year, will transform your balance, your breathing, your stress levels, and your sense of groundedness in ways that no occasional long session can match. Begin where you are, with whatever movement you know, and let the practice accumulate. The form will meet you there, exactly as it has met millions of practitioners before you, and carry you forward, one slow, breathing step at a time.
Frequently Asked Questions
How long does it take to learn the 24-form tai chi?
Most beginners can learn the basic sequence of all 24 movements in 3 to 6 months with one or two classes per week plus daily home practice of 15 to 30 minutes. Memorizing the choreography is only the beginning, however. Refining the movements, coordinating breath, and developing the internal feeling of qi can take years. Be patient: learning one section thoroughly before moving to the next is far more effective than rushing through the whole form.
Is the 24-form tai chi suitable for complete beginners?
Yes. The 24-form, also called the Beijing short form, was deliberately created in 1956 to be a simplified, accessible introduction to Yang-style tai chi. It removes the most physically demanding movements from the traditional long form while preserving the essential principles. Beginners can modify stances to be higher and reduce the depth of weight shifts until strength and flexibility improve. It is the most widely taught beginner form in the world.
How long should it take to perform the full 24-form?
A typical performance of the 24-form takes between 5 and 8 minutes at a slow, relaxed pace. Beginners often take longer, 8 to 10 minutes, because they pause between movements to remember the next. As fluency develops, the form becomes continuous and settles into a natural 6-minute rhythm. Some advanced practitioners perform it even more slowly, taking 10 to 15 minutes to emphasize internal awareness, but this requires developed leg strength.
Do I need to learn the 24-form in a particular order?
Yes, the form is a choreographed sequence and the movements flow in a set order, divided into three sections. However, you do not need to learn them all at once. Most teachers introduce the form section by section, ensuring students are comfortable with the first 8 movements before progressing. Practicing a single movement or short segment repeatedly is a valid and effective way to learn.
Educational content only. Not medical advice. This article is for educational and informational purposes only and is not a substitute for professional medical advice, diagnosis, or treatment. Always consult a qualified healthcare provider before beginning any new exercise program, especially if you have joint, balance, or cardiovascular concerns. Read our full disclaimer →